|
|||||||
| Register | FAQ | Members List | Calendar | Today's Posts | Search |
 |
| Thread Tools | Rate Thread | Display Modes |
|
#1
|
|||
|
|||
|
windshield center post deletion STC
My new LP aeroplastics windshiled goes in this week (starting tomorrow). I have been emailing back and forth with Ray Torres of RT Aerospace about his STC that gets rid of the center post. Since the center post is 'part of the airframe', you need to use his STC to make bond the windshield to the frame.
he sells the whole STC kit for $600, or a lower cost option of $200 for the STC paperwork and right to use (and you fabricate your own metal plates and obtain hdw etc). 1) Has anyone else used his STC? 2) If so, did it make the install longer/shorter, and by how much? 3) Did you buy the kit, or fabricate your own metal plates? 4) Any advice on the value of going down this road (postivie or negative), especially based on the addiitonal 600 in cost? -Robert rmorris@agsi.us ________ HOW TO ROLL JOINTS Last edited by rmorris : 03-12-11 at 12:03 PM. 
|
|
#2
 06-30-09, 10:21 PM
|
||||
|
||||
|
What are the plates for? Why remove the center post if there's still plates that need to be installed?
|
|
#3
07-01-09, 09:58 AM
|
||||
|
||||
|
I debated this option when I installed my new glass in February. I have seen one plane with the mod. Jack Dick was at the SOAPA flyin last year in Kalamazoo and his N/A late model aircraft had this mod. The plate is at the bottom and center of the windshield. It is about 6 inches long from the fuselage up into the windshield. It really was a nice option as I sat in his front seat and looked out the windshield with a non-obstructed view. I guess I just didn't research out the option for my install. I was so concerned with mounting the windshield correctly and in a reasonable time frame that it just was not thought about. Today I look at my install and finish and have no regrets of leaving the center post in. Cessna really wanted to eliminate the center post in their design but did not take the time to re-engineer the design to be able to remove the post. With the utility class of the Skymaster it was a critical part of the structure for the types of use. I have some pictures of Jack's plane but don't remember if the mod is clearly visible or not. Anyway that's just me.
__________________
Herb R Harney 1968 337C Flying the same Skymaster for 47 years
|
|
#4
07-01-09, 10:24 PM
|
|||
|
|||
|
sealant
My mechanic says he thinks he can fabricate the metal plates relatively inexpensively, so looking like that might be the deal.
On sealants, can different folks tell me what they used as far as sealants when replacing thier windshields and pros cons (ie do you wish you chose something different or very happy). My plane is a Turbo and I will be taking it into the low flight levels, so want to make sure I have a sealant that will hold up. rmorris@agsi.us ________ HERBAL GRINDER Last edited by rmorris : 03-12-11 at 12:03 PM.
|
|
#5
07-01-09, 10:39 PM
|
||||
|
||||
|
Here is what you want to use to seal in the windshield. This is good stuff and will do the job. Once the windshield is in you can then tape off the window to airframe (about 3/8") and use this same stuff to create a calk bead. Looks perfect. This ProSeal is what Cirrus uses to install all windows (beech too)
Take a look in the SM, you can change the rivets to screws on the cuff the holds the windshield in place. Makes it a lot easier to install. I have some photos if you need. http://www.aircraftspruce.com/catalog/appages/ps890.php
__________________
Herb R Harney 1968 337C Flying the same Skymaster for 47 years
|
|
#6
07-01-09, 10:47 PM
|
|||
|
|||
|
sealant
How much of this stuff did you buy for your job (the pint or quart).
So you used this for the fill in the large cracks stuff (my mechanic had recommended the 3m 'chalk') as well as the bead on the outside? Is that what Cirrus does? How long does it take to cure? What p/n screws did you use? I saw something in the service manual about using screws for a re-install, but thought rivets would look better. Yes, I would love to see pics. ________ Ford Mt75 Transmission Last edited by rmorris : 03-12-11 at 12:03 PM.
|
|
#7
07-01-09, 10:56 PM
|
|||
|
|||
|
pro-seal
herb, your link to aircraft spruce showed the pro-seal fuel tank sealant...I did a little googling and found this link:
http://ableaero.com/PPG/Windshield_and_Canopy.html is this more likely the stuff used by Cirrus & beech ? It looks like pro-seal stuff, but built for windshields? ________ 300 Letter Series Last edited by rmorris : 03-12-11 at 12:03 PM.
|
|
#9
07-02-09, 10:51 AM
|
||||
|
||||
|
You can control the set time by how the ProSeal is mixed. I would still use the felt around the windshield as original but use lots of ProSeal to bond everything. It is really messy but it is very doable. Remember, do not use any type of solvent to clean the plastic window. The only petroleum base cleaner that can be used safely is kerosene. The ProSeal is really pretty easy to use once you understand it. Initially it appears to be a mess but with some practice it really isn't bad. Cure times are typically 8-16 hours but in cold weather like I had it was like 2 days. Yes it is fuel tank sealant. For just the windshield a pint is adequate.
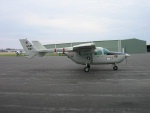
Photos below are showing the "chalking" per say after the window is installed. This is the finish step.
__________________
Herb R Harney 1968 337C Flying the same Skymaster for 47 years
|
|
#10
07-02-09, 12:33 PM
|
|||
|
|||
|
finshing step?
Herb,
First, thanks for sharing both your experience and the pics. Happy if others would jump on with theirs as well - so we have a nice repository on this thread. You said the pics are the finishing step. Let me summarize where I think they are, please correct where I'm wrong. you've done the following in the two pics with no black goop: - removed old windshield - cleaned the area well (did you jsut use mineral spirits for that piece?) - put the felt tape that came with window around the edges, being careful not to stretch it - pushed the window into place (under upper screw positions, which were taken out during the removal process) - taped off the area with the blue tape leaving about an inch on both sides, then extending out your tape line with masking tape (why did you use two different tapes, and what is the blue one) Then it looks like in the black goop pic that you applied the Pro-seal fuel tank sealant in the crack all the way around the windshield. My assumption is that you then let it cure for a couple of days and then applied the metal strips with screws (in my case still thinking rivets) - or did you apply the metal strips right after putting the windshield in place and let it cure in the final format (ie squeezed some by the metal strip)? Any pics of the are in front with the screws versus rivets? ________ Porntube Last edited by rmorris : 03-12-11 at 12:03 PM.
|
|
#11
07-02-09, 07:21 PM
|
||||
|
||||
|
I'd love to see a pic of the windshield mod plate, that replaces the windshield center post.
|
|
#12
07-03-09, 08:56 AM
|
||||
|
||||
|
Can you put the center delete on a P model? You should double check the STC before you get too involved. The center strip is to keep the winshield from blowing out, and I would imagine it is more "at risk" under pressure at altitude. Just worth the double check.
|
|
#13
07-03-09, 09:15 AM
|
||||
|
||||
|
Center post plates
Quote:
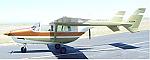
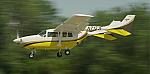
First photo is Jack's plane with the center post deletion. I forgot I had this photo and it details the plates really well. Attached is the best picture I can find right now but I could go out and take a picture of the plane today with the new paint of these screws that replaced the rivets, You definitely want to use these screws, trust me, going back with rivets would be a nightmare. You get into this project and you will understand. Just order the screws so that you have them there because you will end up using them. The screw size is spelled out in the SM. When the original windshield was removed, the clean up and prep started. I used all kinds of stuff to clean the airframe. Mineral spirits was there but I really didn't use much of that on this area. Mineral spirits work good for oil and grease but this is adhesive and glue that you are cleaning. I first used a plastic putty knife. My windshield was installed with green putty. It was still pliable after 40 years. After removing all the big stuff with the putty knife then it was Touline (like acetone) to remove the sticky adhesive type stuff. 2 days later it was ready for the new windshield. Well maybe not 2 days but it sure seemed like it. It's like performing surgery on you favorite dog and you're not a veterinarian. You going to really take your time and do things a little overboard. http://www.337skymaster.com/messages...?t=2309&page=3 The ProSeal is used during the install of the new windshield. It is used on both sides of the edges of the windshield. I applied the ProSeal to the airframe and then pushed the windshield into it. On the bottom a bead was applied to the frame and after the windshield was put in place then another bead was put on the windshield to seal in the lower retainer strip. When the screws were installed some of the ProSeal squeezed out and other places I added more with a wooden paint stick forcing it the space. This ProSeal sealing process took about 4 - 6 hours of time to finish and clean up. Very tedious. It took me longer because I have never worked with this product before. The more I worked with it the more I understood it. With the pictures above at the paint shop when they applied the finish "caulk" seal around all the windows, they did the whole plane in about an hour. They do it everyday. Makes a huge difference. The tape they used that is blue, it's a 3M plastic tape (like black electrical tape) and they use it for masking when they remove paint, striping when applying new paint and this window sealing. It works better than masking tape because it's plastic and it bends nicely and doesn't bleed through. It also removes nicely and when they did this ProSeal to the windows they pulled the tape off within the hour of apply the ProSeal. The ProSeal is a two part product. The main component is cream color and the hardener is black. The more hardener the blacker the mix and the quicker the set. In the case of the photos above it was mixed very rich with black because of the dark color and it cured quicker. There was probably a month between installing the windshield and finishing the windows with the ProSeal at the paint shop. The paint shops biggest concern was DO NOT USE SILICON, and don't seal around the windows until after the paint is applied. This way they were able to paint all the airframe up to the window without any seal in their way. That is one of the details that made my paint job come out so nice. Good luck and just plan for lots of time (3 days minimum) so that you don't get frustrated.
__________________
Herb R Harney 1968 337C Flying the same Skymaster for 47 years Last edited by hharney : 07-03-09 at 09:18 AM.
|
|
#14
07-10-09, 07:19 PM
|
|||
|
|||
|
caluk?
" With the pictures above at the paint shop when they applied the finish "caulk" seal around all the windows, they did the whole plane in about an hour."
Did they also use the same pro-seal stuff for the 'caulking stage' ? ________ Smoking kills Last edited by rmorris : 03-12-11 at 12:04 PM.
|


 Linear Mode

