|
|||||||
| Register | FAQ | Members List | Calendar | Today's Posts | Search |
 |
| Thread Tools | Rate Thread | Display Modes |
|
#1
|
||||
|
||||
|
Front Cowl Flaps
Hello Everyone
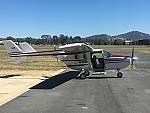
Need some help, I have removed both front cowl flaps for inspection, strip and paint. Once both flaps were removed I noticed the right flap was different in the vertical skin to the left, the part you see when the flap is extended (can't think of anyother way to describe it). There is a little tidy up work to do on this verticle piece were it is folded over 90 deg. But I question is there tidy up work because some of it has broken away. Have not been able to locate any drawings or pictures to refer too, would any of you be able to extended right cowl flap and take a photo of it, in particular the inside looking upwards next to the exhaust. No other 337's near by for me to look at, closest is about 3hrs drive away. Regards Dave PS: Thought I would share a photo of the project, we have almost completed the tail section and booms, they should be painted in the next few weeks. Then onto the wings before finally the fuselage. The photo is after a weekend of paint stripping all 3 layers of paint, what a mess acrylic makes, nose cowls left until removed for preparation by hand. Last edited by SkyMac : 04-15-11 at 06:00 AM. 
|
|
#2
 02-27-11, 06:23 AM
|
||||
|
||||
|
Dave
I can't find any good photos in my archives to help you. What I have seen happen is the bushings for the cowlflap linkage will get sloppy and cause some misalignment. Also the muffler mounts get worn and sloppy and the tail pipe from the muffler will contact the cowl flap when closed and cause some wear on the flap. I won't be able to send any new photos until next week.
__________________
Herb R Harney 1968 337C Flying the same Skymaster for 47 years
|
|
#5
04-06-11, 02:20 AM
|
||||
|
||||
|
Hi Herb
Yes please, you can email to me if you would like. david.sargeant@effem.com Many thanks and appreciate the support. David
|
|
#6
04-06-11, 01:29 PM
|
||||
|
||||
|
Dave
I have sent you the photos via "You Send It" service. Let me know if you can download them. It was 35 MB so it's big file. Hope it helps
__________________
Herb R Harney 1968 337C Flying the same Skymaster for 47 years
|
|
#7
04-06-11, 11:42 PM
|
||||
|
||||
|
Hi Herb
The photo's are exactly what I am after, they clearly show me I have some more fabricating to do in replacing the vertical piece on the R/H cowl flap. Although not worn away to badly we will manufacture a replacement, the rest of the cowl flap is near perfect. Unfortunately I have not been able to locate this one particular piece and even the parts manual refers to a complete unit. My engineer shakes his head and say's a little bit over the top Dave, and shows me a few others in service on Cessna's, I think he mentions pedantic ! Anyway Herb greatly appreciate the efforts to get the photo's for me.  Regards Dave Last edited by SkyMac : 04-06-11 at 11:45 PM.
|
|
#9
04-10-11, 06:35 AM
|
||||
|
||||
|
Hi Joe
I used an enviormental friendly stripper manufactured by Allied Chemicals, this was recomended by others. There are a large number of options available for removing the paint, the main reason I chose this one was easy cleaning and removal from joins, it is also very easily de-activated with water. Now I had numerous layers (3 or 4) of paint including the original which I believe was acrylic, as it reacted to the stripper quite differently to the enamel. What I did was tape all of the joins around the cowls, gear doors etc with a 1/4 inch wide aluminium tape, also covered any plastic with aluminium covered paper. Once this was done I went about painting on the stripper in a fairly thick coat, predomently I broke the fuselage up into 10 sections and worked on one at a time (I will attach photo's so you can see). Once this was done the plane was pressure washed whislt being careful where you washed. Then I used a green scotch brite pad and paint thinners to give the whole fuselage a good going over, being sure to have a good amount of thinners on the pad, then dried it all off. Removed the tape and paper and when I'm ready it will be washed and scubbed with detergent and a red scotch brite pad before acid etching. Joe it's not that hard if you prepare the area where you will do the job, have all the safety gear on as most strippers burn. Critical is to think about the aircraft and any areas where the stripper should not get into, cover and mask using aluminium foil type tapes and paper. Be prepared for a long haul and just keep plugging away. I have the job sheet at home and I think it took me 23hrs just to remove the paint from the fuselage, I did it over a weekend. A good supply of plastic scrappers is also paramount, I used ones about the size of a credit card. I still have the wings to go, but that will be in a few months after I complete work on the tail sections and booms, which are almost ready to paint. Paint stripping an aircraft is one of those not so nice jobs, but with the right equipment, area, advice and asking the right questions you can get a lot of satisfaction from the finished job. One final thing, make sure you keep your A&P close by to inspect prior to adding any stripper and once the job is finished. Dave Last edited by SkyMac : 04-15-11 at 06:00 AM.
|


 Linear Mode

