|
|||||||
| Register | FAQ | Members List | Calendar | Today's Posts | Search |
 |
| Thread Tools | Rate Thread | Display Modes |
|
#1
|
||||
|
||||
|
Hello ALL.
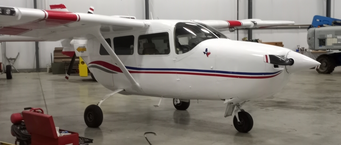
Need some advice on removing my front alternator. Having a problem with the front alternator not charging, did the diagnostics. I read in the MX manual and it does say to remove it from the left side of the aircraft. But has anyone remove one before. NEED HELP!! Thanks in advance Regards, BILLS Owner, Pilot, and A&P 
|
|
#2
 07-26-23, 08:53 AM
|
|||
|
|||
|
I'm told the essentials are:
1. 1/4 in set of crow feet wrenches 2. 1/4 in wobble extensions 3. 1/4 in to 1/8 in strip of black tape wrapped clockwise on nuts so when the tape is pulled the nut rotates onto the stud. Use screwdriver or finger with grease to hold nut in place. (my favorite for any tough nut location, especially the vacuum pumps). Is the anymore tips or techniques for tough location anyone has used. Please elaborate if so, thanks Joe
|
|
#3
07-26-23, 03:37 PM
|
|||
|
|||
|
Save the aggravation.
Find 20* btc; remove left magneto. Remove clamp holding breather tube; rotate out of way. Remove / replace alt. If no one has messed with prop or magneto. Reinstall, You DO keep spare mag gaskets; right???
|
|
#4
07-26-23, 05:12 PM
|
||||
|
||||
|
FYI
Ordered a alternator seal using the part # from the Continental IO360 Parts Manual thru Aircraft Spruce Part # 352068 This has happened twice now Received a SKF 9613 Alternator had a SKF 8648 in it Just looked at aircraft spruce it it shows this part # is for a Generator Attaching Parts for Continental C85, C90 & 0-200 If you are ordering parts you might want to double check what you need and what you will get
__________________
1967 337B Flying in Skymasters since I was 16
|
|
#5
07-26-23, 07:18 PM
|
|||
|
|||
|
Ok.
I saw your Aircraft Spruce remark. “ wasn’t AS fault”. Not sure where we’re going with this….( always a good idea to know what you are ordering) The alternator gasket is 649984— $4.95 The gasket is used to mate alternator to engine. Not sure where your seal goes. Have you checked with the alternator manufacturer / repair facility.?
|
|
#6
07-26-23, 07:56 PM
|
||||
|
||||
|
I looked in the Cessna parts catologue - 1965 - thu 1969 337
Mine is 1967 337b We took all assesories off engines and replaced all seals o-rings and gaskets Ordered parts from aircraft spruce Alternatior parts replaced #1 - part # 352066 gasket - crosses over to 649984 #5 - part # AN123864 o -ring - crosses over to AS3570-111 #6 - part # 352068 -seal - no cross over this was a SKF9613 When we pulled alternator it had a SKF8648 in it I have attached break down from parts catolouge
__________________
1967 337B Flying in Skymasters since I was 16
|
|
#7
07-26-23, 09:10 PM
|
||||
|
||||
|
TO Joes.
Thanks for the reply for removing the alternator! Here's what I found while remove the alternator. I took a 1/2" BOX END WRENCH ground 1/2" notch in the end to allow it to be used like an open end wrench but with the ability to make small turns of the nut that an open end wrench won't allow. Does that make any sense? FYI-It took almost as long to remove the terminal connections (45 minutes) VS removing the mounting nuts (1hour)! Thanks again, Regards. BILLS Owner/pilot/A&P '65 C337 Last edited by cessnadriver : 07-26-23 at 09:14 PM. Reason: forgot some info
|
|
#8
07-26-23, 09:32 PM
|
|||
|
|||
|
To Cessnadriver
The road gets made by walking it .... becoming creative is necessary to owning a 337. That's why this website is so valuable, from the past authors to the present, we all will eventually walk the same path. Joe
|
|
#9
07-26-23, 10:55 PM
|
|||
|
|||
|
Reminder: there’s recommendations regarding the alternator coupling. When I did my front alternator, I upgraded the coupler. Prior owner had his rear alternator seize, gears stripped and engine seized on climb out. So I changed to the other “slip” style coupler.
https://www.qaa.com/wp-content/uploads/SB95-3B-1.pdf https://www.aopa.org/news-and-media/...or-inspections Last edited by wslade2 : 07-26-23 at 11:03 PM.
|


 Linear Mode

